
 |
| Original all the detail is hidden under layers of dirt and paint! |
I should have taken a picture of the top which was stained with ring marks, scratches and just general abuse. Additionally there were stickers and tape all over the piece.
I don't usually use paint stripper but a few things occurred to me when we started sanding the top of this piece. First, I don't know what type of paint they used on this puppy. It is old, so it wasn't completely impossible that sanding it was causing me to breath in lead paint. YUCK! Next, it became clear this piece was painted and painted and painted. When you are working on something old and you don't know exactly what kind of paint you are dealing with, it is probably better to be safe than sorry and use stripper to remove the majority of the finish first. Breathing in lead paint is a no-no. Not to mention we went through a belt sander pad and 2 orbital sander pads just on the top. To put that in perspective, I have sanded an entire dining table with one orbital sander pad and not even retired the thing after. My belt sander has had one pad change since I bought it. We put a brand new one on for this piece and my husband used it on part of the top and it shredded the sanding belt.
 |
| Top sanded and Paint stripper applied |
I don't usually use paint stripper but a few things occurred to me when we started sanding the top of this piece. First, I don't know what type of paint they used on this puppy. It is old, so it wasn't completely impossible that sanding it was causing me to breath in lead paint. YUCK! Next, it became clear this piece was painted and painted and painted. When you are working on something old and you don't know exactly what kind of paint you are dealing with, it is probably better to be safe than sorry and use stripper to remove the majority of the finish first. Breathing in lead paint is a no-no. Not to mention we went through a belt sander pad and 2 orbital sander pads just on the top. To put that in perspective, I have sanded an entire dining table with one orbital sander pad and not even retired the thing after. My belt sander has had one pad change since I bought it. We put a brand new one on for this piece and my husband used it on part of the top and it shredded the sanding belt.
This desk is just mean! So mean, in fact, I started to worry about what I would find when I got through the top. Was it wood or some 70's reproduction of an antique desk in laminate that I was wasting my time on? Was it possessed? Was this desk actually tossed out because it was evil? When I put this in the kid's room, was blood going to start dripping from the ceiling and strange eyes stare back from the windows. Was she going to be encouraged by the desk to murder her father and myself in the middle of the night? I may or may not have thought of these things as I worked on it. I also may need to stop watching horror films and Forensic Files. (Shout out to Mili-Wife: if this happens, sell the story to Lifetime. It will make the best darn movie they have made in a LONG time!)
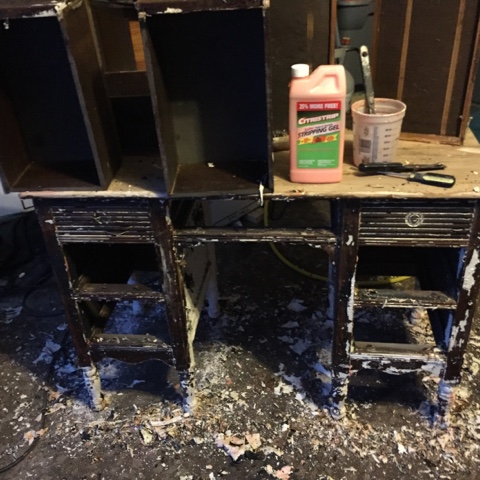 |
| Citristrip and elbow grease |
A few things to know when you use paint stripper:
*It is incredibly messy-see all the paint chips on our garage carpet? Yes, I should have put plastic down, silly me.
*Use gloves: I am terrible at this and always end up with stains and paint all over me but this stuff is toxic, I mean it removes paint for heaven;s sake, so use gloves unless you are just incredibly careful.
*Let it sit....and sit...and sit. The longer, the better, up to 24 hours. The longer you let it sit, the easier it peals off. Even if you don't get it all removed and it dries, the stripper has cracked the paint and made it much easier to remove. I used a putty knife and just peeled the stuff right off.
*Don't give up. Keep the big picture in mind. When I get frustrated with this project, I remind myself of the vision I have for this piece and that, if not for the quick thinking of my husband, this charming old desk was headed for the landfill. It is soon to grace my kids room and with the help of an old chair from my dinning room and some new fabric for the cushion, she is going to have a nice place to do her homework. All this work will pay off. Unless, of course, it is possessed, in which case, well this will just suck.
Note: The last picture isn't what it looks like now, but you are going to have to wait until part 2 for the rest.


